
These are almost embarrassingly easy. This is convenient as the amistad cultivar is not especially hardy – a few cuttings for insurance purposes are a good idea. I’ve taken a couple of rounds of cuttings this year, this batch was taken in mid-October.
I took a couple of bits of stem and began wielding a scalpel, my weapon of choice. I cut through just below a leaf joints, removing those leaves, then just above the next leaf joints, removing any excess leaves. When finished the cuttings look like this:

In my case I used the hydropod but they work just as well by plonking them into a pot of compost. I know this as I broke a piece of stem when moving a more mature plant – I just poked it into the same pot and it rooted there quite happily.
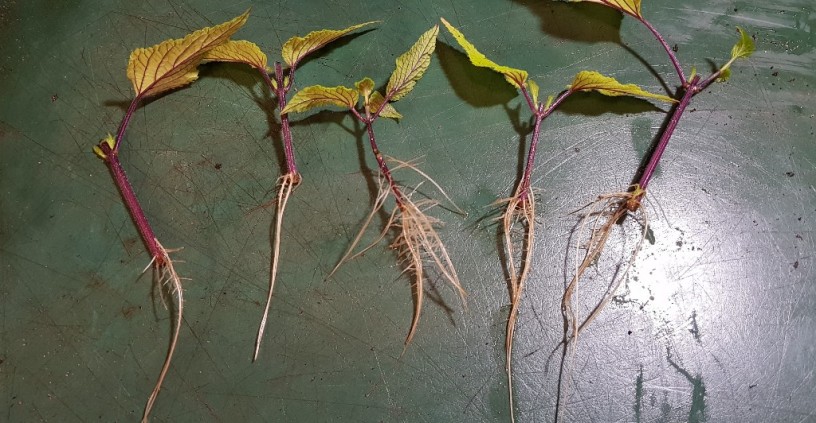
A month later I had good roots on all my cuttings.

I potted them up in John Innes #3 compost and left them in the heated bench for a month or two.

They have all grown on quite nicely and should make good garden plants this year. I have moved them out of the heated bench and onto in heated staging in the greenhouse.

Salvia ‘amistad’ is a little bit hardy, it should cope with a few degrees of frost, but to maximise chances it is best planted in well drained soil in a nice warm spot.
I’ll be back soon with more propagation poppycock.

Thank you so much, I’ve clearly left too many leaves so will try again.
Free tip: Amistad is the best salvia in the world. Grow more of them! Give them to friends! They should be everywhere 😆
LikeLike
Love taking cutting of any of the salvias from licky lips to Amstad. Have taken multi cuttings this October.
LikeLiked by 1 person
I have managed to root 3 Salvia guaranitica ‘Black and Blue’ (I think) and they are now 20cm tall, a single stem. I am tempted to take out the tip, to create more of a ‘bush’ shape…is this the right thing to do.
Loving your posts….and advice. May get myself a hydroponics thing to root stems into!
LikeLiked by 1 person
Yes i should think that would work. You might even use the removed parts as more cuttings material. Might be a bit soft.
LikeLike
Thank you for the clear instructions and the clear photo too just how I like ti see it, easy to follow!
LikeLiked by 1 person
Oh good, glad you found it useful. Give it a go!
LikeLike
I haven’t had much luck with my last few cuttings. Fuchsias died a death but got some honeysuckle I’d like more of and a rose I don’t really need rooting.
LikeLiked by 1 person
I don’t need any of em! I do enjoy the process though.
LikeLike
Same as my houseplants. I have no need for another spider plant but it’s satisfying rooting the pups.
LikeLike
The chaparral salvias are notoriously difficult to grow from cuttings without the proper equipment. Those who propagate them in nurseries do not seem to have much problem doing so with bottom heat and the proper medium. They must really keep things clean too. White sage just rots for me. So do almost all the native salvias.
LikeLike
I’m going to up my cuttings game this year. Salvia ‘Amistad’ will be one on my list!
LikeLiked by 1 person
Such a good plant and (at the risk of jinxing you) dead easy to propagate. Good luck!
LikeLike